Friday, July 2, 2010

What A Smock

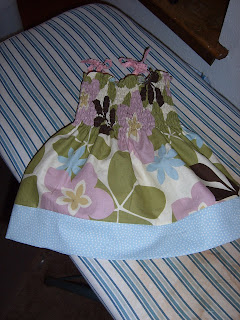
So you remember this little smocked sundress?


You know the one that matches this adult sundress?


Which kind of matches this blouse?


Which matches a chair?


Well anyways the sundress is so tremendously cute.


And it’s so amazingly easy to make that I just had to share it with the world.


So I taught a class on how to make it.


Which is why they call me:


Wait


For


It:


Professor Smockinator DUN Dun dun. 


Actually that's only true if I include myself in the "they" category.

But enough about me, back to my class.


I had AMAZING students.

And we had tuns of fun.


And by the end of the day they had made dresses like this:


To, to, to to cute. You can’t tell from here, but she twisted some pink and green rick rack and it was so fantastically cute! I must “borrow” that idea!

And Cheryl made these two little dresses.


Adorable!


And then I saw Cheryl a few days later and she had made all of these!


YOU SEW GIRL!


What a lucky little grand daughter she has!


~INTERMISSION~

Please enjoy a moment as I attempt to demonstrate how to make the smocked sundress.


First you will need a few measurements:


The child’s chest,
And From Chest to Hem.

Cut some 45” wide fabric the length of the dress plus ½” for the hem and ½” to finish the top of the dress. For this dress I am adding a contrasting band so I cut the fabric a little shorter. But don’t forget to account for the whole seam allowance thing.


Then I finish the top edge. In this case I surged the edge and turned it under.


Then I turned it under again:


And I edge stitched it in place.


Now I grab my elastic thread and I wind it onto a bobbin.


 The directions on the elastic thread package tell me to wind the bobbin by hand, but I ignore that. I just skip wrapping the thread around the tension bar thingy (instead I hold it by hand) to prevent the elastic from stretching too much.


Next, sew several rows of stitching with the elastic in the bobbin.


Space the rows approximately ½ to 5/8” apart to create a smocked effect. Don’t forget to pull the fabric straight as you sew or you will sew in tucks and the dress won’t stretch. And you need it to streeeeeeeetch or you’ll never get it on your cute little precious angle. I usually smock about 1/3 the length of the dress.


Generously squirt the elastic with water to relax it.


 Go ahead and soak it Baby!
Now watch it shrink! This is the best part!


Cut the width of the fabric. I use my rotary cutter cause it’s the right thing to do.

Just make sure you don't accidentally cut your Netflix which gets stored on your cutting table for some reason.


You should cut it so the width is 1½”SHORTER than the child’s chest measurement when relaxed. Trust me. If you don’t the dress will fall right off and you’ll have to wait till next summer for your darling to strut the cuteness.


Go ahead and sew up the back seam.


I like to use a ½” seam allowance but you can use whatever you want. This is also a good place to use your surger if you have it.


Then I add my band.


 First I cut it the same width as the hem of the dress fabric and twice as long as I want the finished band to be. Again don't forget about those seam allowance thingies.


Then I sew the short ends together.


And press them open.


Fold the band in half lengthwise, with the WRONG sides together.


Pin it to the dress with right sides together.


Sew this to the dress. I used my surger again.


Press the band down.

To make straps I just cut 4 lengths of rick rack.
The seam becomes center back. Measure 1 ½” to 2” away from center back on both sides to find the back strap placement.


Measure the same distance from center front to find the front strap placement.


Sew these in place.


 Tie the straps up to have cute little bows at the shoulders!


And Voala!


 Cute little sundress.
Easy Peasy.
 Go make your favorite little darling one.
GO!


Happy Smocking
~Melisa and Cordelia

Friday, June 18, 2010

The California Files: Why I Love San Fran.

This is the Mama Hart:


This is The Papa Hart:


This is Cordelia.


We are all waiting for an airplane to take us to San Francisco.


Well almost all of us. Cordelia doesn’t get to come because she doesn’t sit in  seats so well. And I didn’t really feel like buying her a ticket. And I don’t really trust her with the baggage handlers. Sometimes she yells at strangers.  I'm really not in the mood to sooth some ruffled baggage handler feathers. Talk about awkward.


Why are we heading west?


To visit him:


The Brother Hart.
(also known to some as Scot)


And her:

 The Future Sister-in-law Hart
(some prefer to call her Lauren).


But really cause The Brother Hart is getting ready to graduate.


From Stanford.


With a PhD.


In Mechanical Engineering.


Something to do with Robots.

Telerobotics to be exact.  Whatever that means.


It’s too bad I stole all the brainiack genes and left him with a measly selection of leftovers.


Except for the fact that he’s older and had first dibs at the gene pool. Poor kid shoulda picked better.
But now I’m digressing. . . . .
Point is I’m heading to San Francisco and you know what that means?


Dim Sum!


And Clam Chowder at Fisherman’s Warf!


AND THIS…


For those of you who have not visited Britex, please remedy this immediately. Thank you.


Trust me, you’ll be glad you did.


EVERYONE should go.


Even those of you who don’t sew.


Even the Papa Hart has admitted it’s a cool place to visit.


True Story.


What is Britex you may ask? Well it’s only a little piece of heaven. A little piece of fabric heaven. It’s bliss. It’s a dream. It’s magical. It’s four levels of nothing but fabric, and thread, and trim, and leather and buttons. And I’m talking about the good fabric. Like Italian wools, and silk, and fine linen and cotton.


Do yourself a favor. Check out Britex's selection of online buttons.


I. CAN’T. WAIT!


~See ya in CA
Melisa & Cordelia

Monday, June 7, 2010

The cool Kids Hit the Town

Meet Vanilla Pop.
“Hello Vanilla Pop!” Says Cordelia.
“Hello Cordelia!” Says Vanilla Pop.


So Vanilla Pop is Albuquerque/ Santa Fe’s greatest, hottest, most talented and fun local band.


Probably.


And even if they aren’t, Cordela and I kind of love them.
Because they wear fantastic outfits.


Like this:


And they sing our favorite songs.
And every first Friday of the month they play at a local bar.
So we go.
And we love it.


Now meet Rosie


“Hello Rosie!” Says Cordelia.
“Hello Cordelia” says Rosie.

Rosie is one of my best buddies and she is the one who introduced me to Vanilla Pop. Thanks Rosie. You rock my world.


Now meet my collection of pencil skirts.


Some may say it’s too big.

But I say it’s not big enough.


Seriously, Cordelia and I love these puppies because, well, they are flattering to our bodies and I can whip one up in about 3 hours.


Well, because we are Vanilla Pop regulars, and because we enjoy sewing, Rosie, Cordelia and I decided to make some fantastic outfits to wear this month.


And because I’m a fan of the pencil skirt, and because Vanilla Pop is a fan of loud nauseating prints I decided to take this fabric:


And turned it into this skirt.


Which looks like this inside:


Bonita! I used the European Turned Underling technique to get that clean finish.


And then I helped Rosie take this bird fabric


And turn it into this skirt.


Which is also equally fantastic on the inside thanks to the European Turned Underlining Technique.


~INTERMISSION~


And now I will take a breather to demonstrate, to those of you who care to know, how to do the European Turned Underlining Technique!!!! And, this is a somewhat unknown technique so you should pay attention. Plus their will be a quiz afterwards.


BUT FIRST


In order to keep a clear sewing teacher conscience,
I must enter sewing geek land and let you know what this underlining thingy is and why you might want to use one anyways.

Underlinings: They’re kind of like a lining but different.

Oh I’m so informative it hurts.
Just Kidding!


OK, ok, for reals this time.


An underlining is a separate piece of fabric that is layered under the fashion fabric. These two layers are then treated as one piece as you construct your project.


Now why in the world would I want to waist all this time and fabric on an underlining?

Because underlinings give support and body to the fashion fabric, so you’ll want to use one in a structured or tailored garment.

They also give opaqueness to garment fabric to hide inner construction. Have you ever found yourself walking down the street and the person in front of you was wearing a pair of white pants where you can see the pockets and seam allowances grinning through? And you couldn’t take your eyes off the stupid pockets because they looked terrible in an otherwise perfectly good pair of pants? I bet you have, and I bet you thought it was tacky (I know that is one of my pet peeves). An underlining would take care of that little problem.

They also prevent stretching in areas of stress, and can act as a nice layer to catch hems or interfacings.


Conclusion:


Underlinings = a good thing.


I bet Martha Stewart would approve.
Learn to love ‘em.
I know I do.

So now that you’ve got all that, here’s how you make my famous European Turned Underlining.


First, cut your fashion fabric according to the pattern.


Then take the underlining fabric and add 5/8” additional seam allowance to all VERTICAL seams. (The white fabris is the underlining).


Take a fashion fabric piece and a corresponding underlining piece and lay right sides together.


Sew ¼” from the edge on all VERTICAL seams. Because the underlining layer is bigger it will pooch, but this is OK, you want it to do that.


Press the seam allowances towards the underlining fabric.


Turn the piece right sides out wrapping the underlining fabric around the fashion fabric seam allowances.


Stitch in the ditch. (AKA stich right in the seam. Sew through all the layers)


And VOLA! European Turned Underlining. Do this to all the pattern pieces.


From here on out you will treat both layers as one and construct the garment according to the pattern directions.


So you would sew the darts into both layers.


Easy Peasy.

You can do it!!!


Um, where was I?


Oh right, back to Vanilla Pop.


So we made our fabulous skirts.

And I made my buddy Miko a skirt too. Cause it’s her birthday soon.


Then we got dressed up.


But I decided not to wear my skirt cause that would be too much pencil in one crowd. Instead I wore my knit dress borrowed from the wedding gown.


Oh we look Good! Like a million dollars baby.

Pop Quiz!

Can you place the shoe with the owner?
Which one belongs to:
Rosie
Miko
Melisa
Danny?

And we hit the town.
And Vanilla Pop was fantastic.


And they Serenaded Rosie


And they walked around the bar.


But we didn't stalk them.  Promis!


 And a good time was had by all! Except for Cordellia because I wouldn’t let her go. She has no ID and the bouncer wouldn’t let her in last time. And I didn’t want to have to waist time taking her home.


Happy Vanilla Poping!
~Melisa and Cordelia

Drape Drape Drape on the Form Part Deux.


You remember this dress? The one I’m making for a client but love so much I had to have one of my own?


Well guess what?


I made myself one. And I LOVE it.
I’m headed to my brother’s graduation so naturally I NEEDED a new dress (lets temporarily ignore the fact that I have a closet full of dresses I could have worn).


And I didn’t have a lot of time to make one, so I decided this dress would be perfect cause I could make it in a few hours.

 
And I really didn’t want to go buy new fabric and decided I had to use something from my stash. So I turned to my Fabric Log Notebook and started flipping through my swatches until I found this one.


Now this fabric is perfectly nice, and it has a great print, but I don’t really look so good in yellow. It makes me look ill. But this was the only knit fabric I had in my stash and this pattern requires a knit.
So then I ran to my collection of sewing notions to find some die, and it turns out the only color I had was fuchsia. Now fuchsia isn’t really my color either, but I though, “ey, I’ll give it a shot.”


And I ended up with fabric that looked like this.


And I loved it. So I made my dress.


I changed it up a bit.


For one thing I raised the back a bit.


And I made this piping to create a woven pattern. It looks better on me.  Cordelia had a broader back than I do and streaches it out a bit.


And VOLA, beautiful graduation dress.


Happy Dressing
~Melisa and Cordelia

Wednesday, June 2, 2010

Drape, Drape, Drape on the Form.


Firstly, 10 Super Cool Human Points to the first person who can name the above movie allusion.


Secondly, the day has come.
The day Cordelia thought would never come.

Finally,
at long last,
after months and months of waiting
I finally had a pattern I needed to drape on Cordelia.

What fun! What excitement! We were ready.

But before we begin, I would like you to take a look at Cordelia's reflection in the mirror! What Photography talent! I promise that was 100%, completely intentional. Or something like that.


Anywho, the first step to draping is to take some thin ribbon and some little tiny baby short pins and create the rough outline of the garment.
 
 
And again for the back. This serves as a guide and will help me know where to mark my muslin later on
 
 
Then I take my muslin (read any inexpensive fabric which has a similar structure and drape as the fashion fabric) and I start pinning it to the dress form until it looks like I want it to.

Oops. Sorry Cordelia did I poke you with that pin?
Yes?
Well tough, get over it, that’s what happens to dress forms.
 

Once I have everything pinned in place I grab my marker and mark things like side seams, and the shape of the armhole.


I use my red ribbon to tell me where to mark my back neckline.
 
I had to pad Cordelia out a bit.  This is why she looks like she has a muffin top.  It's not because she has been eating too many homemade truffles. 
 

Then it’s just a snip, snip here and a stitch, stitch there, here a snip, there a stitch, everywhere a snip stitch. Old Melisa had a dressform!
Er, um. Waite. What I mean to say is:
 
VOLA!
I have a completed muslin (read rough draft of the final garment) ready for the first fitting.
Go ahead and call me


Wait


For


It


The DRAPEANATOR DUN DUN DUN!
 
But only if you wish.
 
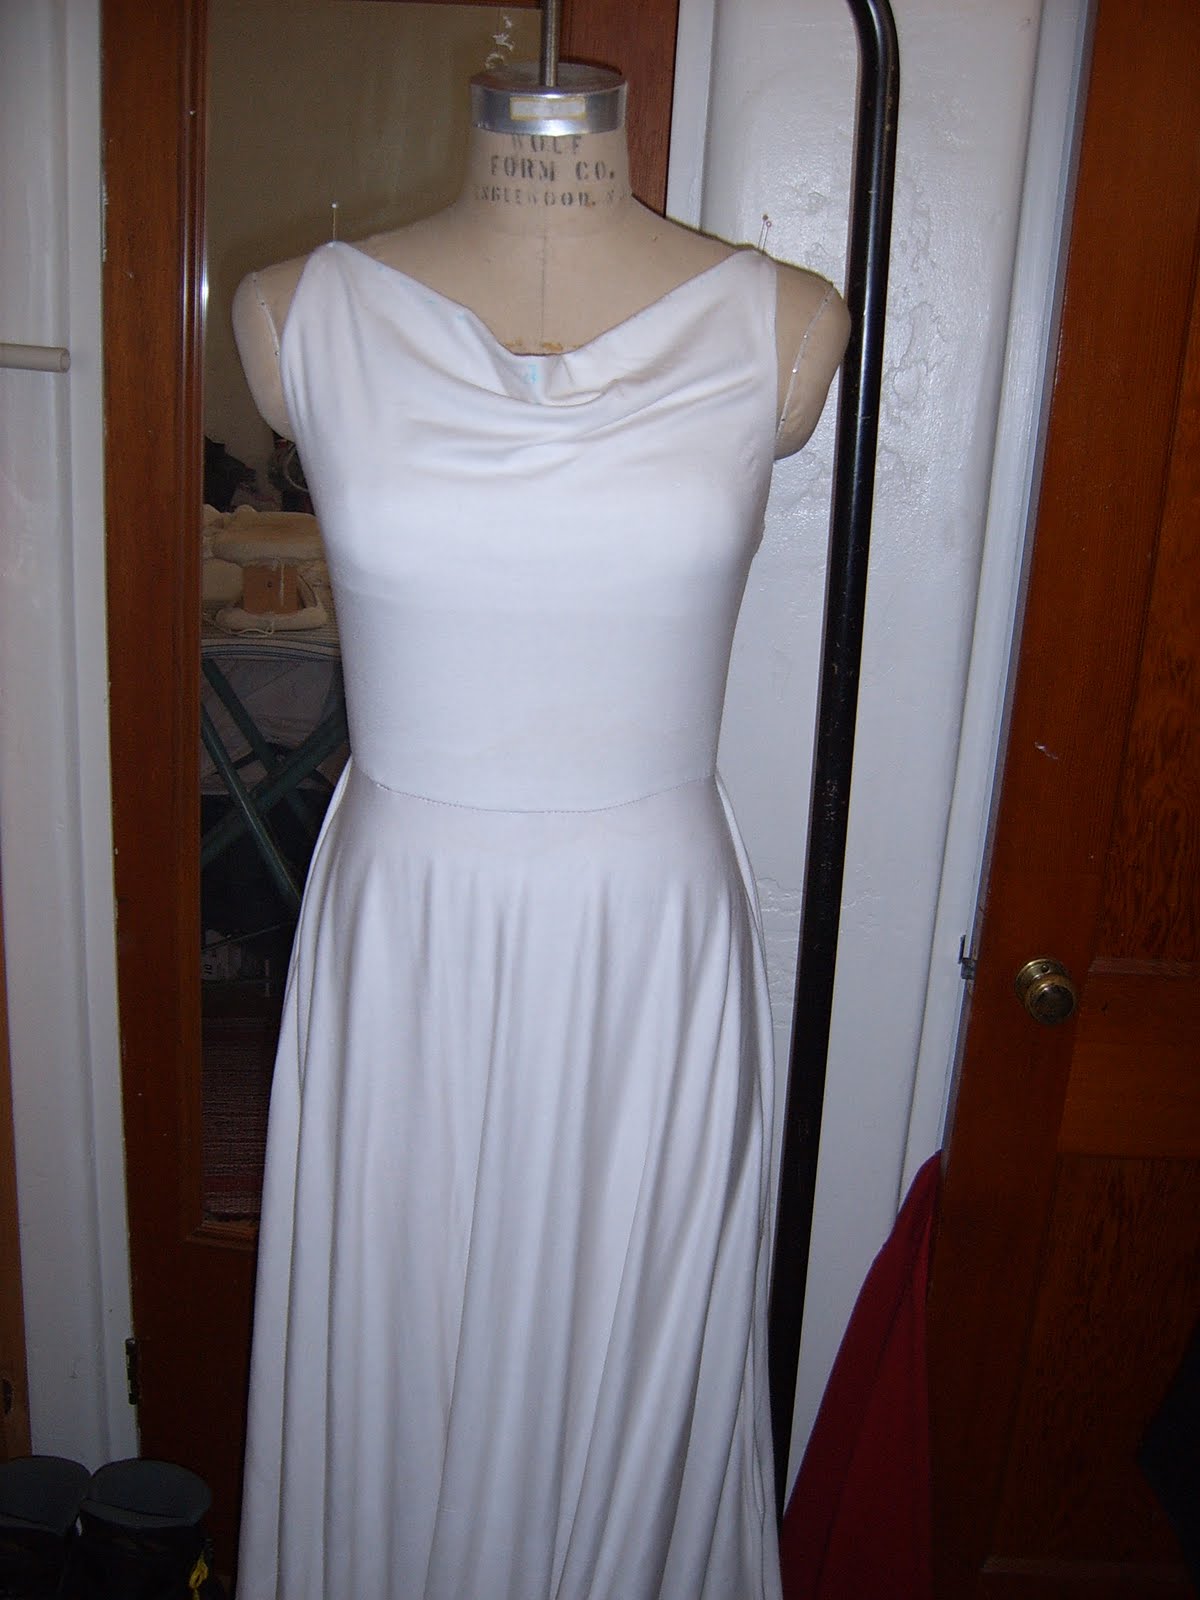
And when you add a skirt to it, it looks even more exciting. Even though I made this for a client, I love it so much I think I will have to “borrow” the design for myself. I can’t wait to cut this out of some green knit fabric and have myself a fab little sundress.
 
~Happy Draping
Melisa & Cordelia