Projects
In the Kitchen
Seam Finishes
Hong Kong
This is a good choice for heavy fabrics or fabrics that fray excessively. It is attractive and is a good choice for seams that will be visible such as those in an unlined jacket.
Put right sides of the fabric together, sew a 5/8” seam and press open.
Cut 1” wide bias tape.
With right sides together, line up the bias tape with the edge of one seam allowance.
Stitch ¼” from the edge. Be careful not to stretch the bias tape much or it will become too narrow.
Fold the bias tape out and press.
Wrap the bias tape around the seam and press.
Stitch in the ditch to hold the bias tape in place. Trim the unfinished edge of the bias if necessary.
Repeat for the other side of the seam.
French Seam
This is a great finish for lightweight and shear fabrics. It is also a good choice for fabrics that will fray.
It is stitched twice, once from the right side and once from the wrong side.
Place WRONG sides together and stitch 3/8” from the edge.
Trim the seam allowances to 1/8”.
Press the seam allowances to one side.
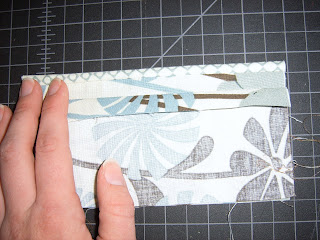
Fold right sides together, with stitched line exactly on edge of fold, and press again.
Stitch ¼” from the fold.
Press seam to one side.
TADA! French Seam Finish!
Flat-Felled Seam
This is a very sturdy seam and is often used in sportswear. It can also be formed on the right side and can be decorative.
On one piece of fabric trim ¼” from the edge.
On the other piece of fabric stitch a fat ¼” from the edge.
Fold on the line of stitching and press.
Lay the trimmed edge of the 1st piece of fabric so that the edge lays in the fold of the 2nd piece of fabric.
Wrap the folded fabric around the first piece and sew close to the edge catching both pieces of fabric.
Press flat.
Stitch close to the folded edge.
One side will have a double row of stitching.
The reverse side will have a single row of stitching.
And look like this.
TADA! Flat Felled Seam Finish.
Overlock
This is a durable stitch that is quick and easy to do. It is suitable for most fabrics including knits.
But first, you need a serger, which looks something like this.
With right sides together, use a serger to sew 5/8” from the raw edge.
Press to one side.
TADA! Overlocked Seam Finish!


Hi, Melisa - I would love a tutorial on the in-seam pocket.
ReplyDeleteHope to see you soon.
Very nicely done, Melisa. Thank you for sharing these with us, and all of the nice photos. I would like to offer one suggestion. It's a little difficult to see the actual stitching and some of the folds, even though you have used a high contrast thread, due to the patterned fabric samples. It's such a wonderful tutorial. Thanks again.
ReplyDelete