

The other day when I was teaching a class at Ann Silva’s I heard all this murmuring about mitered corners and how terrifying they are. To hear the ladies talk, you would think sewing a mitered corner is on par with finding yourself in a dark ally with a green, World’s Largest Ball Of String sized, drooling, blob of flesh eating Jello with rattle snake fangs.

It took me back to a time when I was a measly design student and I too had vivid nightmares about sewing mitered corners.
And then I did the unthinkable and ACTUALLY sewed a mitered corner and learned something fascinating.
Mitered corners are absolutely, positively most definitely 100% EASY to sew.
So today I have decided to share my painless technique with you.
Master this and your friends and family will think you are some kind of sewing protégée. Go ahead and let them think this and then you can charge them an additional 20% when they order hand sewn Christmas presents from you.
Lets get going then on our mitered corner!
The first and most important step to making a flawless and painless mitered corner is: DO NOT OVER THINK!
I repeat: DO NOT OVER THINK.
DO NOT THINK!
AT ALL!.
Er um, hold on, maybe you should think just a little bit so you don’t accidentally sew through your left big toe or chop off your right ear or burn your belly button with the iron (this is possible, don’t ask me how I know---and yes I was wearing a shirt.)
Back to the mitered corner. In clothing you typically find the mitered corner in the hem. It may be in a skirt with a slit or a button up blouse or a pant leg with a slit, or it could be in the hem facing, or um, well my brain is freezing, but typically if you have a mitered corner you also have a hem.
So you have to decide how you want to finish this hem. You can finish the raw edge with a Hong Kong binding, or do a folded and folded hem, or just zigzag or serge the raw edges. The options are endless.
Today I will show you how to do the mitered corner with a turned and turned hem.
First measure, fold and press the first fold. Typically this is ¼" to ½” wide. Before folding I stitched ½” from the raw edge to mark where to fold. I find this is easier than using my little sewing gage (little ruler with a slidy bit).
Do this to both sides


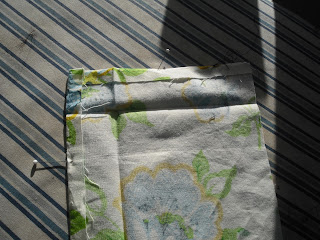


Now measure, fold and press the second fold. I like to make skirt hems 1 ½” – 2” wide so that’s what I’ll do here. Make sure to get a good crease of the center point.


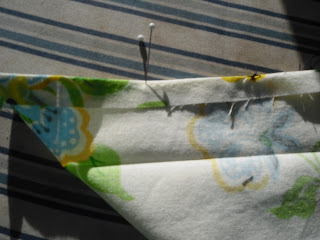
Stick a pin on each side where the two sides intersect.

Open up the second fold (if you zigzag the raw edge or Honk Kong bind it you will only have one fold. Open it up).

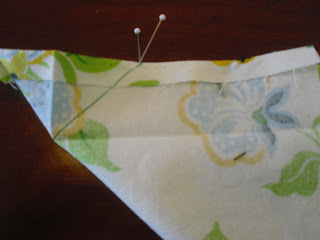
With right sides together, fold the fabric so the two pins line up.

Draw a line from the pins to the center crease. Sew along this line.

Trim leaving a 1/4" seam allowance.

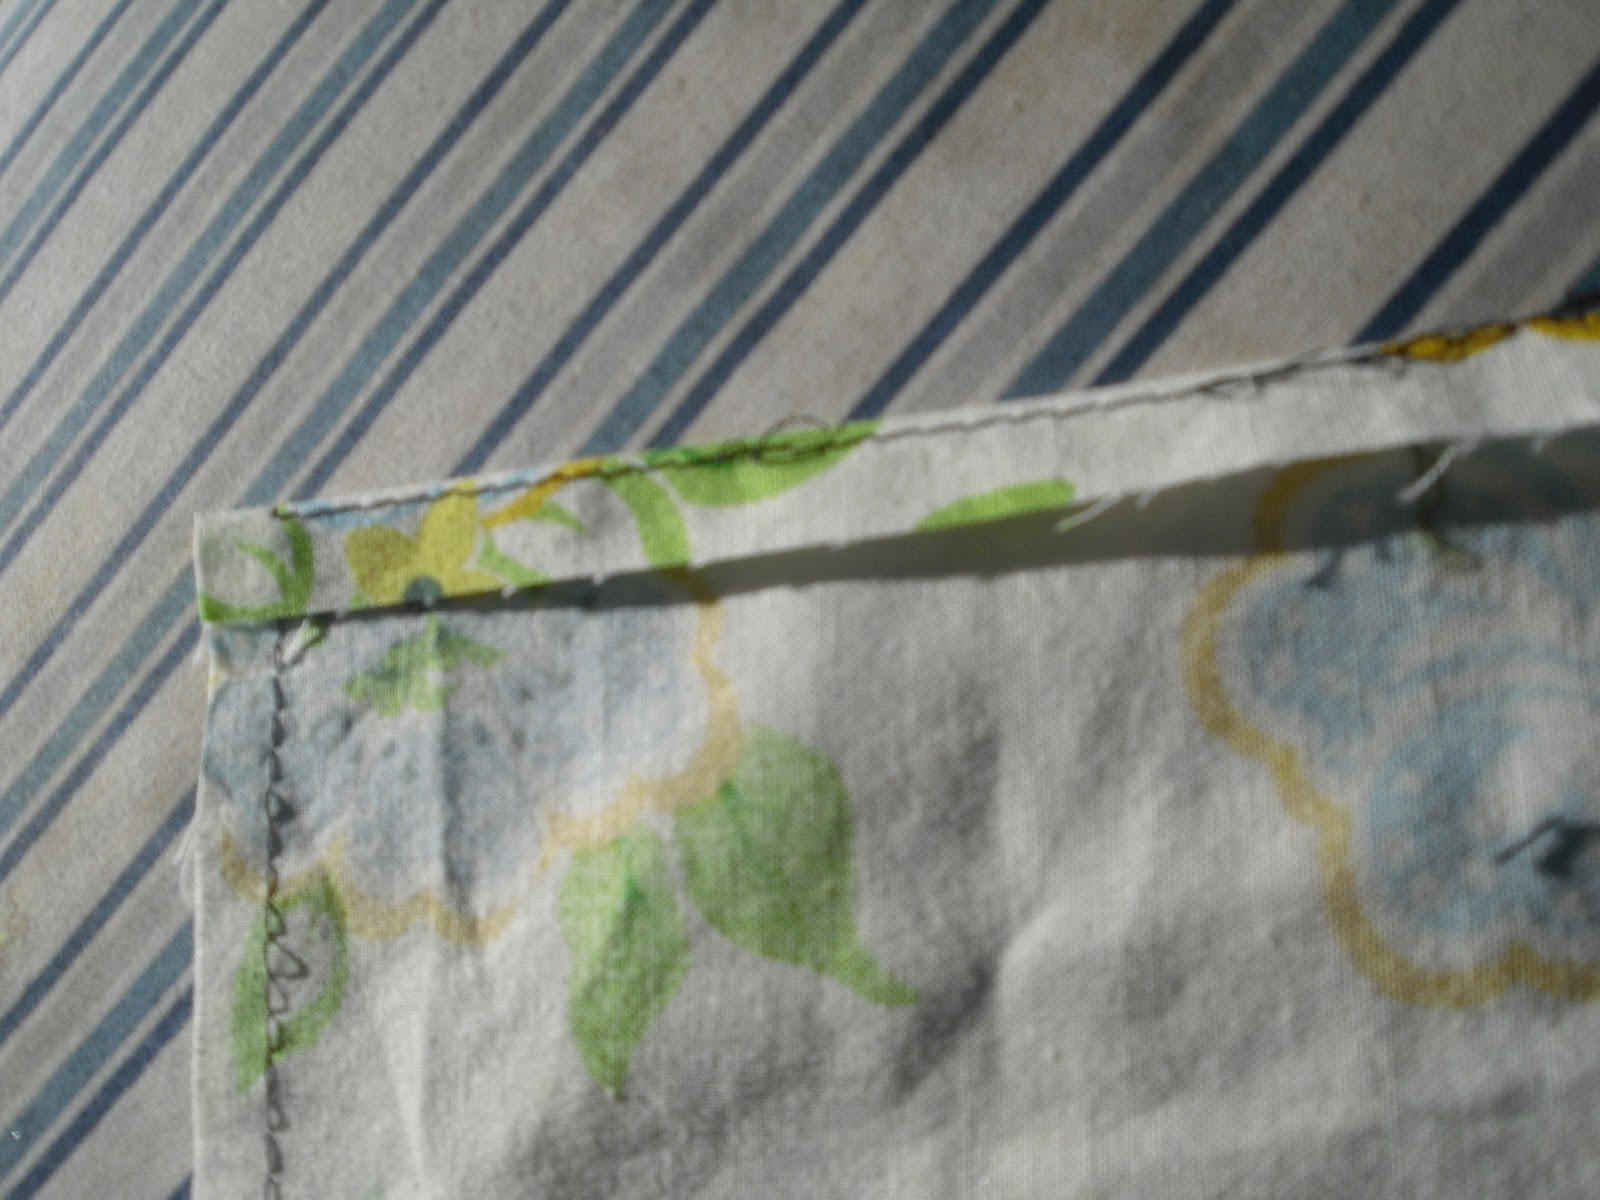
Press the seam open.

Flip so the right side is out and press.

Voila, a beautiful mitered corner.
How easy was that?!?!
Seriously, not the material of nightmares.
And look at how much better my hem looks with a mitered corner than one without the mitered corner.

Beautiful mitered corner.

Less beautiful not mitered corner.
Soo worth the extra .0349734 seconds it takes to make.
Try it, you’ll like it. Trust me. And if you don’t like it, feel free to send all complaints to Cordelia
Happy Mitering
~Melisa & Cordelia
can't wait to try this
ReplyDeleteI can't wait for you to try it either!! You will love this technique, it's so easy and it looks really nice!!
ReplyDelete