
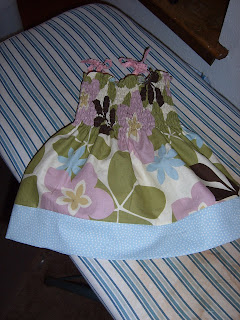
So you remember this little smocked sundress?

You know the one that matches this adult sundress?

Which kind of matches this blouse?

Which matches a chair?

Well anyways the sundress is so tremendously cute.
And it’s so amazingly easy to make that I just had to share it with the world.
So I taught a class on how to make it.
Which is why they call me:
Wait
For
It:
Professor Smockinator DUN Dun dun.
Actually that's only true if I include myself in the "they" category.
But enough about me, back to my class.
I had AMAZING students.
And we had tuns of fun.
And by the end of the day they had made dresses like this:

To, to, to to cute. You can’t tell from here, but she twisted some pink and green rick rack and it was so fantastically cute! I must “borrow” that idea!
And Cheryl made these two little dresses.

Adorable!
And then I saw Cheryl a few days later and she had made all of these!

YOU SEW GIRL!
What a lucky little grand daughter she has!
~INTERMISSION~
Please enjoy a moment as I attempt to demonstrate how to make the smocked sundress.
First you will need a few measurements:
The child’s chest,
And From Chest to Hem.
Cut some 45” wide fabric the length of the dress plus ½” for the hem and ½” to finish the top of the dress. For this dress I am adding a contrasting band so I cut the fabric a little shorter. But don’t forget to account for the whole seam allowance thing.

Then I finish the top edge. In this case I surged the edge and turned it under.

Then I turned it under again:

And I edge stitched it in place.

Now I grab my elastic thread and I wind it onto a bobbin.

The directions on the elastic thread package tell me to wind the bobbin by hand, but I ignore that. I just skip wrapping the thread around the tension bar thingy (instead I hold it by hand) to prevent the elastic from stretching too much.
Next, sew several rows of stitching with the elastic in the bobbin.

Space the rows approximately ½ to 5/8” apart to create a smocked effect. Don’t forget to pull the fabric straight as you sew or you will sew in tucks and the dress won’t stretch. And you need it to streeeeeeeetch or you’ll never get it on your cute little precious angle. I usually smock about 1/3 the length of the dress.
Generously squirt the elastic with water to relax it.

Go ahead and soak it Baby!
Now watch it shrink! This is the best part!
Cut the width of the fabric. I use my rotary cutter cause it’s the right thing to do.
Just make sure you don't accidentally cut your Netflix which gets stored on your cutting table for some reason.

You should cut it so the width is 1½”SHORTER than the child’s chest measurement when relaxed. Trust me. If you don’t the dress will fall right off and you’ll have to wait till next summer for your darling to strut the cuteness.


Go ahead and sew up the back seam.

I like to use a ½” seam allowance but you can use whatever you want. This is also a good place to use your surger if you have it.
Then I add my band.

First I cut it the same width as the hem of the dress fabric and twice as long as I want the finished band to be. Again don't forget about those seam allowance thingies.

Then I sew the short ends together.

And press them open.

Fold the band in half lengthwise, with the WRONG sides together.

Pin it to the dress with right sides together.

Sew this to the dress. I used my surger again.
Press the band down.
To make straps I just cut 4 lengths of rick rack.
The seam becomes center back. Measure 1 ½” to 2” away from center back on both sides to find the back strap placement.
Measure the same distance from center front to find the front strap placement.
Sew these in place.

Tie the straps up to have cute little bows at the shoulders!

And Voala!

Cute little sundress.
Easy Peasy.
Go make your favorite little darling one.
GO!
Happy Smocking
~Melisa and Cordelia
Nice post, apart from all the weird spelling mistakes. Is your daughter really an "angle" versus an "angel"? And it's a serger, not a "surger".
ReplyDeleteYour explanation on finishing the top edge with a surge and a turn under is so clear and made the process smoother for me. Also, the pictures you shared of the dresses made by your students, especially Cheryl’s lovely creations, truly show how versatile and fun the making of this dress can be even without a clothing patterns. It's a fantastic tutorial for anyone wanting to craft beautiful clothing for their loved ones like me!
ReplyDelete